Notifications - Beeper Recommendations After Setup
It's our goal to deliver the best chat experience in the world and that includes the way you receive and manage your messages notifications. Here's how we recommend setting up your notifications:
After you have completed the setup process, we highly recommend disabling native app notifications to avoid receiving double notifications.
By disabling the native app notifications, you can ensure that you will only receive notifications through Beeper, eliminating the risk of receiving multiple notifications for the same message.
How to set up Beeper Notifications on Mac
To start, you can manage your Beeper Notifications on Mac by going to the Apple logo () in the top-left corner > System Preferences > Notifications > Beeper
- From there, you can manage your Beeper Notifications on Mac (macOS Sequoia Version 15.4.1).

In this view, you can enable “Allow notifications” and select Banners or Alerts depending on your preference. You can also manage the following settings from here:
- Enable “Show notifications on Lock Screen”
- Enable “Show in Notification Center”
- Enable “Badge application icon”
- Enable “Play sound for notification”
- Show Previews: Always or When Unlocked (Default if Always or When Unlocked us set as your default notifications previews settings.)
- Notification grouping: Automatic
How to set up Beeper Notifications on Windows?
You can manage your Windows notifications (Windows 11 Home) for Beeper by going to Settings > Notifications and actions:
- From there, you can manage your Windows settings to affect Beeper:
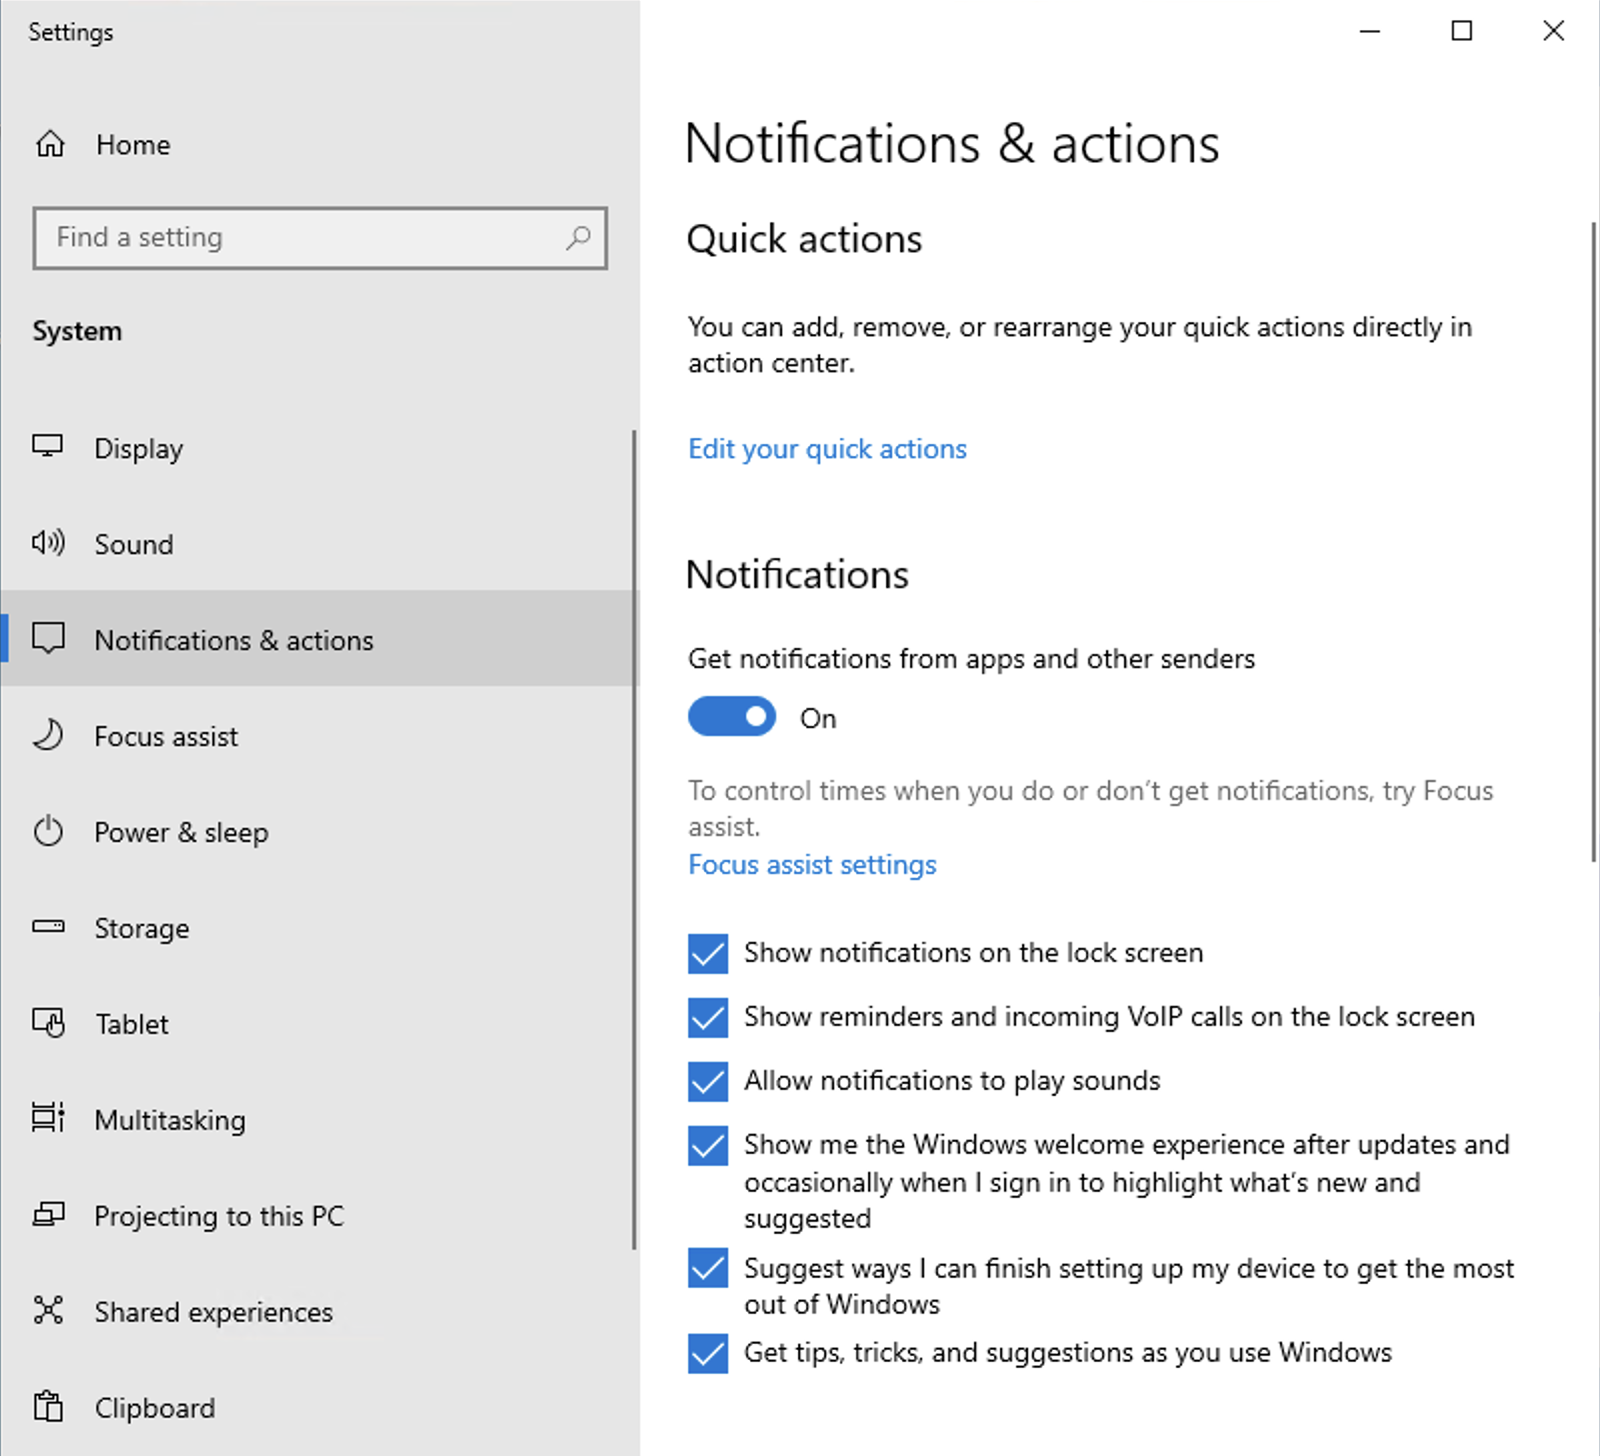
On this view, you can enable “Get notifications from apps and other senders”:
- Enable “Show notifications on the Lock Screen”
- Enable “Allow notifications to play sounds”
How to set up Beeper Notifications on iOS?
You can manage your Beeper Notifications in iOS Settings. On your device, open Settings > Notifications. From here you can manage your overall iOS Notifications (iOS 18 Version 18.4.1), If you want to see them as Count, Stack or List.
Scroll down to the app-specific settings, and select Beeper, and it should take you to this page:
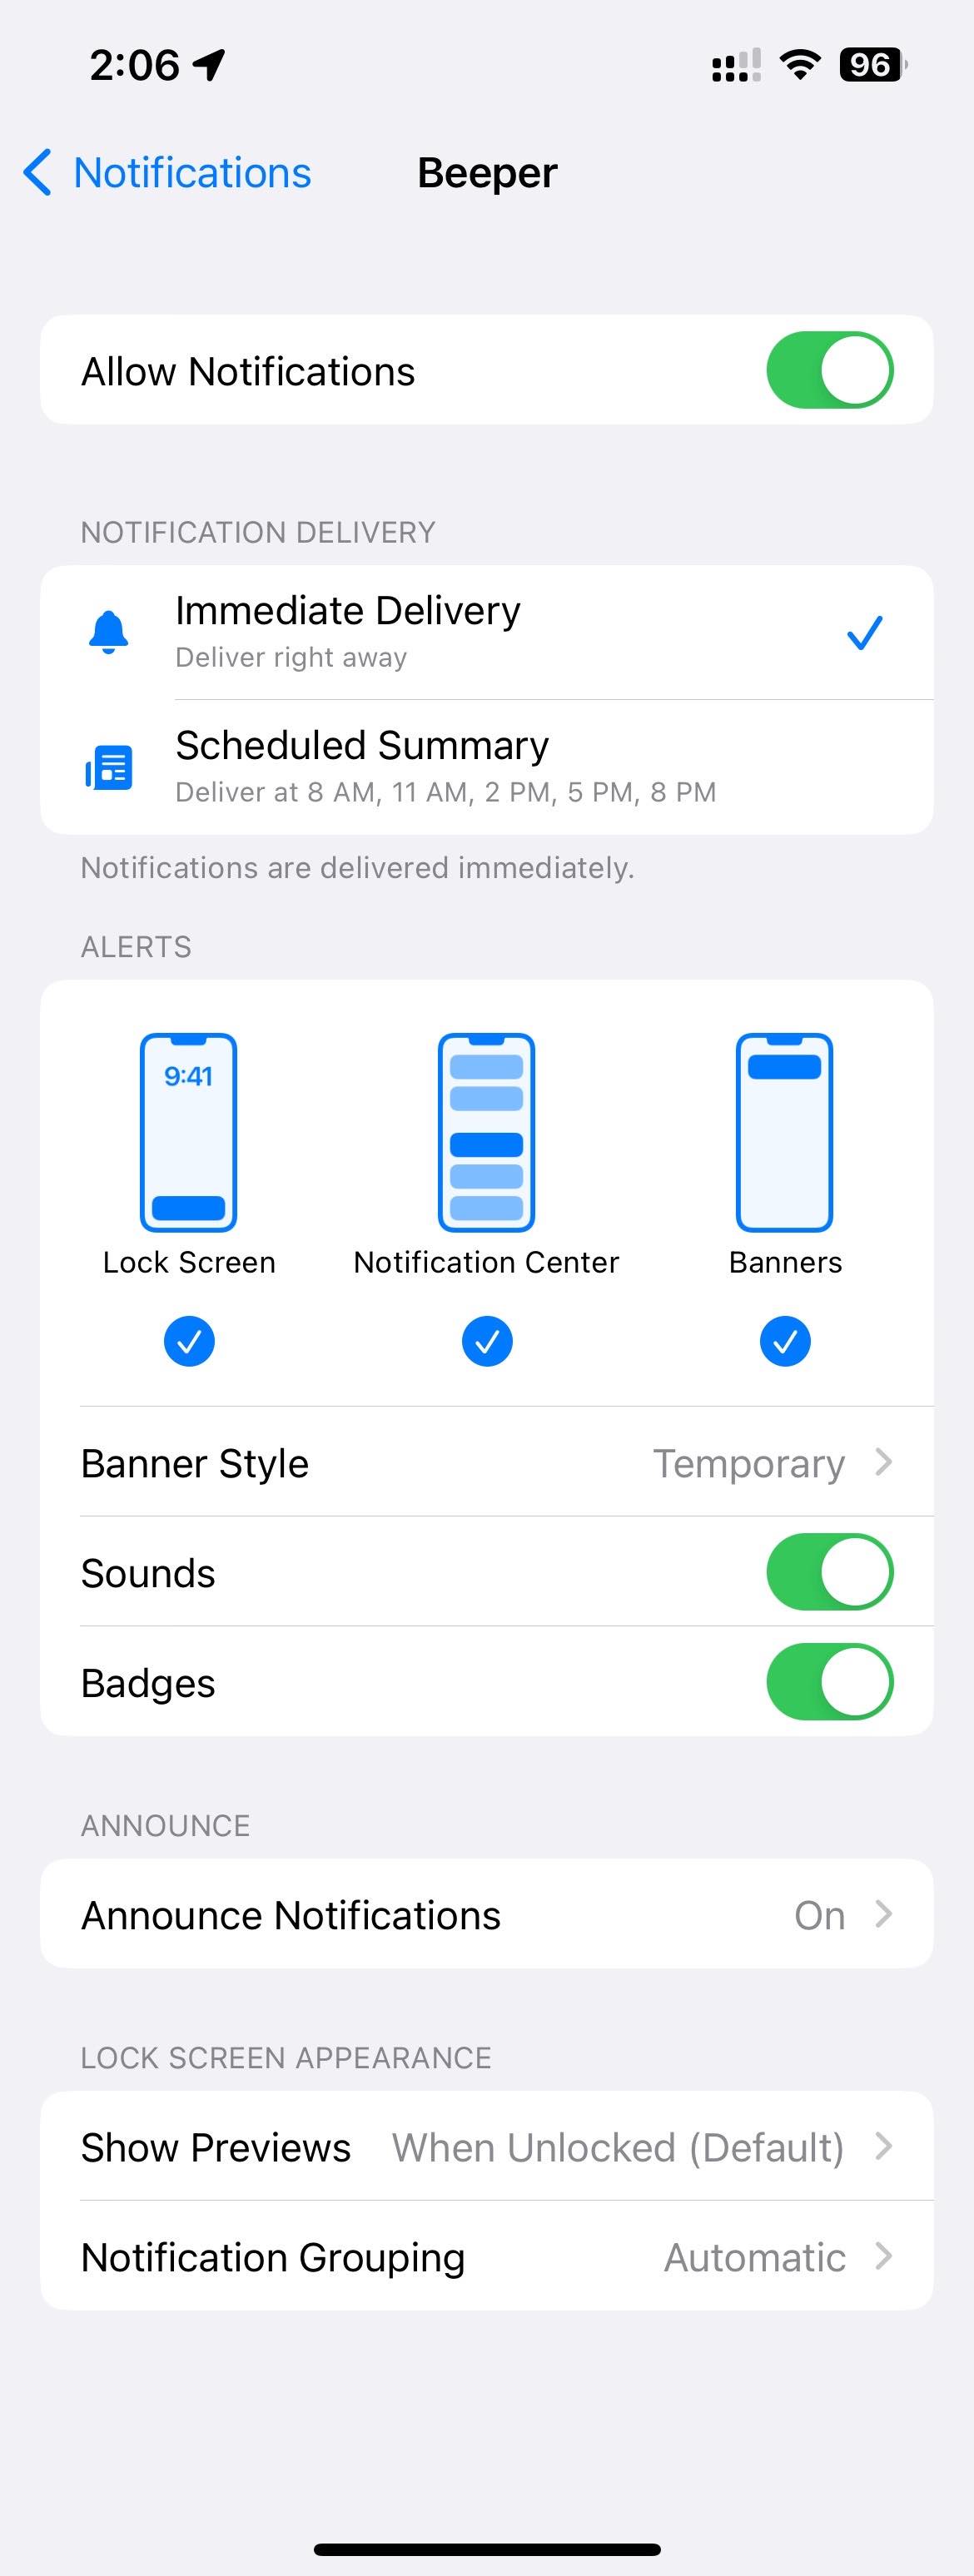
Here are our recommended settings:
- Notification Delivery: Immediate Delivery.
- Alerts: All enabled (Lock Screen, Notification Center, Banners).
- Banner Style: Your choice.
- Sounds: Enabled.
- Badges: Enabled.
- Announce Notifications: Your choice.
- Lock Screen Appearance: Show Previews Always or When Unlocked; Notification Grouping: Automatic
How to set up Beeper Notifications on Android?
To set up your Beeper notifications on your Android device (Android 15), just go to Settings > Notifications > App notifications > Beeper:
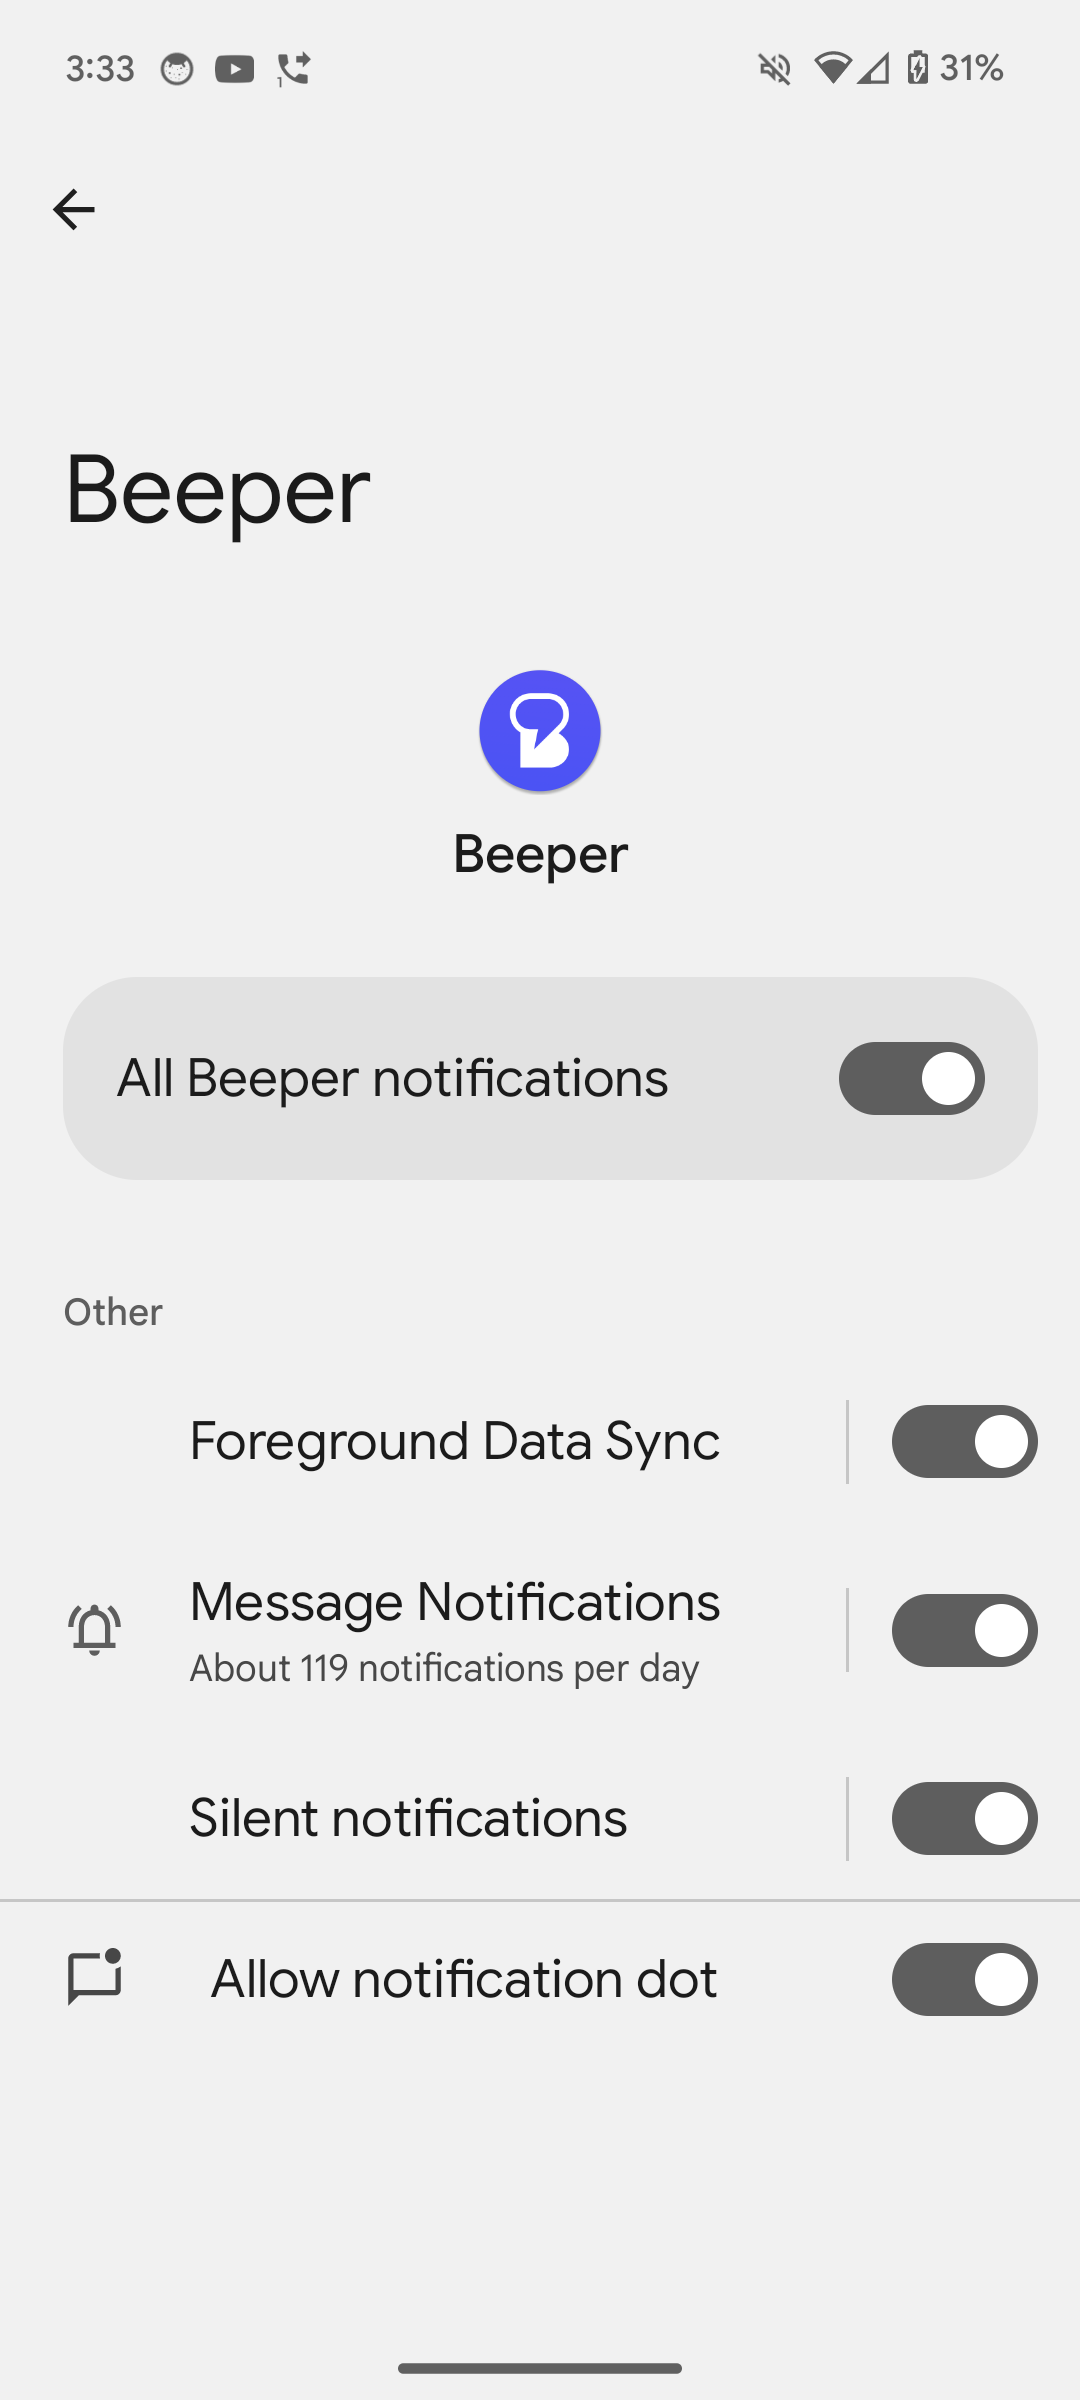
Note: Please note that the Android screenshot shared above is specific to Google Pixel devices on Android 15. Settings on each Android device may vary by manufacturer or Android version, but should be similar to what we shared here.
Here's what we recommended:
- Foreground Data Sync: Enabled
- Messages Notifications: Enabled
- Show Notifications: Enabled
- Avoid setting “Silent” (Set to Default)
- Pop on Screen: Enabled
- Sound: This will be defaulted to “App provided sound.”
- Vibration: Enabled
- Lock screen: Select your choice
- Show notification dot: Enabled
- Override Do Not Disturb: Select your choice
- Silent notifications:
- Show notifications: Enabled
- Set to Silent
- Minimize: Select your choice
- Lock screen: Select your choice
- Show notification dot: Enabled
- Override Do Not Disturb: Select your choice
- Allow notification dot: Enabled
Related articles: